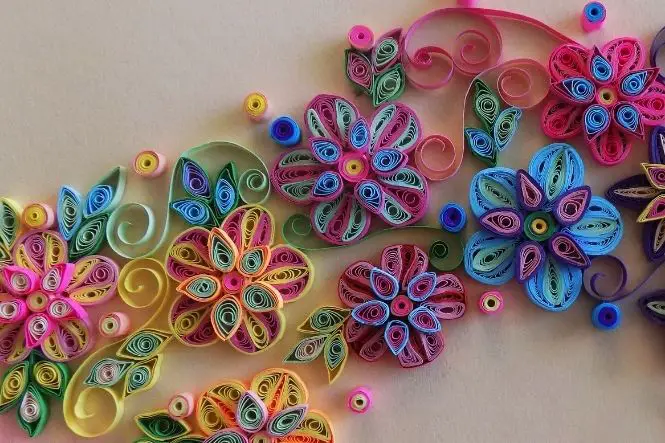
Quilling is the art of turning strips of paper into rolls, curls and scrolls to decorate items or as part of a clever design depicting flowers, animals, spaceships, princesses or anything you fancy. It’s actually a much simpler craft for kids to try than it looks.
It is hundreds of years old and was particularly popular during the 18th century. As homemade scrapbooks and greetings cards have become increasingly popular, quilling has seen a revival and its appeals are now delighting many children.
Tools for Quilling
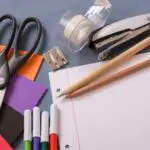
Tools and materials needed for quilling are very simple and inexpensive.
The most important item is the paper itself. You can use any colour you choose or for some really special effects, try recycling magazine paper. The paper needs to be thick enough so it can be curled into stiff shapes but thin enough so even the youngest artists will find it fairly easy to handle.
Accomplished quillers can use very thin strips of paper by using a special tool but as a general rule, the younger the child, the wider the strips of paper you need.
Aim to use strips of about about 5mm or ¼ inch wide. Make sure you have loads of paper strips to hand or the craft comes to a grinding halt and the kids may lose interest halfway through. If you tire of cutting strips with scissors, you could always run sheets of paper through a paper shredder. This may be a good time-saving idea for older kids who can work with thinner strips.
It’s possible to make the quilling shapes with fingers alone but if you want to use a tool to help, try using a thin drinking straw, or a skewer or cocktail stick for older children. A plastic coffee stirrer is a good idea as it has a small slot at the end that you can push the end of the strip through before you start rolling. This is similar to a proper quilling tool.
The only other essential you need is some clear PVA glue to secure the ends of your coiled paper strips and fix the shapes to the finished artwork.
How to Quill
The basic shape for paper quilling is the tight coil. Even the youngest kids should be able to get the hang of this shape with a few practice runs. Start by making a tiny fold at the end of the paper strips and starting coiling it round itself to create the tight snail shape. Finish the coil by applying a tiny dab of glue to the loose end to secure it.
To make more intricate shapes pinch one or both ends of the coil to make teardrop or oval ‘eye’ shapes.
When you have rolled a tight coil, leave one end unsecured to create a ‘scroll’ effect by joining the tail with the tail of another coil. With these basic shapes, you can build many simple pictures. Use a large, tight coil for the centre of a flower, surrounded by a cluster of teardrop coils for petals and a scroll or simple strip of paper for a stem. Glue these shapes onto a piece of card and you have a beautifully quilled flower.
Quilling Projects
Quilling is extremely useful for young artists. Once they have mastered the basic art they can try out increasingly challenging projects which will encourage them to create large designs using small and simple shapes. It’s like an intricate, homemade puzzle! Using simple outlines, they can progress to animals, figures or any theme that interests them.
Use finished quilling designs to make superb cards, collages, picture frames or even 3D designs and sculptures.
Sadly, quilling is often overlooked as an activity for young artists, as too fiddly or complicated. Nothing could be further from the truth. With a little know-how and practice, they will begin to see some stunning results which never fail to impress.